Showing posts with label Desserts. Show all posts

Tuesday, May 14, 2013

Lemon Coconut Bars

Luscious Coconut Lemon Bars - Still to try

 To start they have a buttery shortbread crust (yum!) with a sweet & tart lemon filling, then sprinkled with coconut! Do I have your attention?! I thought so. So, here we go...let's get these delightful bars in the oven!


A delicate buttery crust with a sweet & tart filling and topped with a generous sprinkling of coconut!
For the crust: Put the flour, cold butter (cubed) and the confectioners sugar into a food processor. Pulse for 10-15 seconds, or until the butter is pea-sized.
It should look similar to this.

Pour the crust mixture into a sprayed 9" x 13" baking pan. Tip: Cover with wax paper (to keep it off your hands) and press until even and firm.

Place in a preheated 350 degrees F oven for 15 minutes. Note: Crust will not be completely baked.

Whip up the lemon filling ingredients.

 I used my new Bobby Flay Rasp Grater to zest the lemon. Tip: Always zest the lemon before juicing them, because it's very difficult to zest the lemons once they're juiced.

Pour the lemon filling mixture over the hot crust and sprinkle with the coconut. If you don't care for coconut, leave it out and dust (sprinkle) cooled bars with confectioners sugar instead.

Place in the preheated 350 degree F oven for an additional 20-25 minutes, or until the filling doesn't jiggle and the coconut is light golden brown.

I think you'll love these luscious lemon coconut bars. We took these to a dinner and everyone enjoyed them!

Luscious Coconut Lemon Bars
For the Crust
Ingredients:
2 cups unbleached or all-purpose flour
1 cup butter, very cold & cubed
1/2 cup confectioners sugar
Instructions:
Preheat oven to 350 degrees F.
Place all ingredients into a food processor and pulse for 10-15 seconds, or until the butter is pea-sized.
Pour crust mixture into a sprayed 9" x 13" baking pan.
Place a piece of wax paper over the mixture and press until even and firm. Tip: Cover with wax paper (to keep it off your hands) and press until even and firm.
Place in a preheated 350 degrees F oven and bake for 15 minutes. Note: Crust will not be completely baked.
For the Lemon Coconut Filling
Ingredients:
3 large eggs
1 1/2 cups granulated sugar
1 teaspoon baking powder
1/4 teaspoon salt
1/3 cup fresh or concentrated lemon juice (approximately juice of 2 lemons)
1 tablespoon lemon zest
3/4 cups coconut
* 3-4 tablespoons confectioners sugar, if omitting coconut
Instructions:
Place all ingredients, except for the coconut into a mixing bowl. Tip: Always zest the lemon before juicing them, because it's very difficult to zest the lemons once they are juiced. 
Beat on low until blended and then on medium speed for 3 minutes.
Pour the filling over the hot crust and sprinkle the coconut. * If you don't care for coconut, leave it out and dust (sprinkle) cooled bars with confectioners sugar instead.
Place in the preheated 350 degrees F oven and bake for an additional 20-25 minutes, or until the filling doesn't jiggle and the coconut is light golden brown.
Servings: 24 bars

This recipe is also featured on Wow Us Wednesdays and Fluster's Creative Muster Wednesdays blog hops!

Let me know if you try these lemon bars, I would love to hear your sweet comments!

Wednesday, May 1, 2013

Moist Vanilla Cake with Cream cheese whipped cream frosting


Vanilla Cake with Strawberry Cream Frosting

Recipe from http://www.perrysplate.com/2009/05/vanilla-cake-with-strawberry-cream-frosting.html
http://www.perrysplate.com/2009/05/vanilla-cake-with-strawberry-cream-frosting.html

Ingredients:

Frosting:
2 8-oz packages of cream cheese, room temperature
1 c (2 sticks) unsalted butter, room temperature
4 c powdered sugar
1/2 c seedless strawberry jam
3/4 c chilled heavy whipping cream
Cake:
3 c cake flour
3/4 tsp salt
1/2 tsp baking powder
1/2 tsp baking soda
3 c sugar
1 c (2 sticks) unsalted butter, room temperature
7 large eggs
2 T vanilla extract
1 c sour cream
6 T plus 1/3 c seedless strawberry jam
2 1/4 lbs strawberries, hulled, sliced (about 6 cups), divided

Directions:

For the frosting, beat cream cheese and butter in a large bowl until smooth. You'll probably want to use an electric mixer for this so you don't end up with lumps. Stop every now and then to scrape down the sides of the bowl. Beat in sugar, then jam. Beat cream in a separate, chilled, bowl until peaks form. Fold whipped cream into frosting. Cover; chill for a couple of hours until it's firm enough to spread.
For the cake, preheat the oven to 325 degrees F. Butter and flour two 9-inch cake pans with 2-inch high sides. In a medium bowl whisk together flour, salt, baking powder, and baking soda. In a large bowl, cream butter and sugar together until light and fluffy. Add eggs, one at a time, beating after each addition. Beat in vanilla. Add sour cream, and beat for 30 seconds. Add flour mixture in three additions, beating to blend after each addition. Divide batter into prepared pans.
Bake cake until a toothpick inserted into the center comes out clean, 50-60 minutes. Remove from oven and cool for 10 minutes. Run a sharp knife around the edges of the pans, then turn cakes out onto a rack to cool completely. (You may even want to refrigerate them for a couple of hours to make this next step easier.)
Using a serrated knife, divide each layer in half horizontally. Place one half, cake side down, on a cake plate. Spread 2 T of strawberry jam over the cake, then spread 3/4 c of the frosting over the jam. Arrange 3/4 c of the sliced strawberries on top of the frosting in a single layer. Repeat two more times with cake layer, jam, frosting, and strawberries. Top with remaining cake layer, cut side down. Spread two cups of frosting over the top and sides of the cake in a thin layer, then frost with remaining frosting. Stir remaining jam to loosen, then spoon teaspoonfuls onto the top and sides of the cake. Use the back of a spoon to swirl jam decoratively into the frosting.
Makes 12 servings.

Nat's Notes:
1. As you can see, I used a 9x13 cake pan and did three layers instead of four. This makes a LOT of cake. (Which seems to justify the pound of butter (between the cake and the frosting) and 7 eggs, no?) It fed well over 20 people at Sophie's party. It does take longer to bake that way. I think I baked it for an hour and 5 minutes or so. Begin the toothpick tests at around 55 minutes, though.
2. Because I decorated her cake, I didn't swirl jam into the frosting.
 I think it’s one of the moistest vanilla cakes I’ve ever had that wasn’t a pound cake. The frosting was fluffy from the whipped cream and had a hint of strawberry cream cheese flavor. After we refrigerated the leftovers and ate it the next day we decided that it was even better chilled.


Notes: Comments from readers: Frosting too slippery and runny. need to put unflavoured gelatin in whipping cream. Recipe adapted from Bon Appetit. original recipe uses 9 inch round pans.

Monday, April 29, 2013

Lemon Crinkle Cookies  (adapted from LDS Living magazine)
Makes 2-3 dozen

Ingredients:
½ cups butter, softened
1 cup granulated sugar
½ teaspoons vanilla extract
1 whole egg
1 teaspoon lemon zest
1 Tablespoon fresh lemon juice
¼ teaspoons salt
¼ teaspoons baking powder
⅛ teaspoons baking soda
1-½ cup all-purpose flour
½ cups powdered sugar

Directions:
Preheat oven to 350 degrees. Grease light colored baking sheets with non-stick cooking spray and set aside.

In a large bowl, cream butter and sugar together until light and fluffy. Whip in vanilla, egg, lemon zest, and juice. Scrape sides and mix again. Stir in all dry ingredients slowly until just combined, excluding the powdered sugar. Scrape sides of bowl and mix again briefly. Pour powdered sugar onto a large plate. Roll a heaping teaspoon of dough into a ball and roll in powdered sugar. Place on baking sheet and repeat with remaining dough.

Bake for 9-11 minutes or until bottoms begin to barely brown and cookies look matte {not melty or shiny}. Remove from oven and cool cookies about 3 minutes before transferring to cooling rack.

*If using a non-stick darker baking tray, reduce baking time by about 2 minutes.

Notes: I made these on April 29th. they were everything I hoped for. chewy, soft  and moist. I would tweak presentation wise as they did not have the crinkly effect that was posted in the LDS magazine. One tip I got from the web and will try the next time is to first roll the dough balls in granulated sugar and then in icing sugar)- the other thing to remember is not to overbake..they might look pale and you might be tempted to let it bake it longer but need to remove them when they have puffed up and the top is no longer shiny 9-10 mins max.) The cookies will continue to  cook after they have been removed out from the oven)

Thursday, October 11, 2012

Mini Cheesecake with Blueberry sauce


  Mini Cheesecakes with blueberry sauce

(adapted from the Joy of Baking)

http://www.joyofbaking.com/Cheesecakes%28Individual%29.html


I used aluminum foil baking cups for the cheesecakes. I found that they peel off easily and stand up really well during the baking process.

Crust:
1 cup (100 grams) graham wafer crumbs or crushed digestive biscuits
1 tablespoon (15 grams) granulated white sugar
4 - 5 tablespoons (55-65 grams) butter, melted

Filling:
2 - 8 ounce (454 grams) packages of full fat cream cheese, room temperature
2/3 cup (130 grams) granulated white sugar
1/8 teaspoon salt
2 large eggs, room temperature
1 teaspoon pure vanilla extract
1/2 teaspoon grated lemon zest
1/2 cup (120 ml) sour cream, room temperature


Cheesecakes: Preheat oven to 300 degrees F (150 degrees C) and place oven rack in the center of the oven. Line 12 muffin cups with paper liners. (Can also use silicone baking cups.)
For Crust: In a small bowl combine the graham cracker crumbs, sugar, and melted butter. Press a heaping tablespoon of crumbs onto the bottoms of the 12 muffin cups. Cover and refrigerate while you make the filling.
For Filling: In the bowl of your electric mixer (or with a hand mixer), beat the cream cheese on low speed until creamy and smooth. Add the sugar and salt and beat until combined. Scrape down the sides of the bowl as needed. Add the eggs, one at a time, beating until incorporated. Add the vanilla extract, lemon zest, and sour cream and beat until incorporated. Remove the crusts from the refrigerator and evenly divide the filling among the 12 muffin cups. 
Bake for about 18 - 22 minutes or until firm but the centers of the cheesecakes still wobble a little. Remove from oven and place on a wire rack. Let cool and then cover with plastic wrap and refrigerate (a few hours or even overnight).
To serve, gently peel off the paper liners and place on your serving plate. Serve with strawberry or raspberry sauce, fresh berries, or drizzle with melted chocolate. These cheesecakes can be covered and stored in the refrigerator for several days.
Makes 12 individual cheesecakes.

Tuesday, June 26, 2012

Summer Fun

Sponge Cake with Pastry Cream and Berries Recipe

Sponge Cake with Pastry Cream and Berries Recipe
  • Basic Jelly Roll Sponge Cake (recipe follows)
  • Pastry Cream (recipe follows)
  • Sliced Berries
  • 1 cup 35% whipping cream
  • 1 cup toasted sliced almonds

Basic Jelly Roll Sponge Cake Recipe

Ingredients:

  • 3 large eggs
  • 1 cup sugar
  • 5 tbsp water
  • 1 tsp vanilla
  • 1 cup sifted all purpose flour
  • 1 tsp baking powder
  • ¼ tsp salt

How to Make the Jelly Roll Sponge Cake:

  1. Heat oven to 375 degrees. Line a 15 x 10 x 1-inch with parchment paper and spray with cooking spray.
  2. Beat eggs in a small bowl with electric mixer until very thick and fluffy. This will take about 5 minutes at high speed. Add sugar gradually and beat very well after each addition. Turn mixer speed to low and beat in water and vanilla.
  3. Sift the flour before measuring, then spoon it lightly into a dry measuring cup and level it off with the back of a knife. Sift measured flour, baking powder and add to egg mixture. Beat on low speed until smooth, scraping down the sides of the bowl often.
  4. Pour into prepared pan and spread evenly with a rubber scraper.Bake 12 to 15 minutes or until top springs back when touched lightly in the centre. Loosen cake around the edges.
  5. Place a clean tea towel over a large cake rack and invert the rack and towel on top of the cake. Turn the cake, towel and rack back over and carefully lift the pan off the cake. Strip the paper off the cake. Let cool.
  6. Position cake horizontally and cut into three equal parts.

Pastry Cream Recipe

Ingredients:

  • 2 cups milk, divided
  • 2 strips lemon rind
  • 3 tablespoons cornstarch
  • 5 egg yolks
  • 1/2 cup sugar
  • 2 teaspoons vanilla

How to Make the Pastry Cream.

  1. In a small saucepan over medium heat, bring 1 3/4 cups of the milk and the lemon zest to a boil.
  2. Meanwhile, in a small bowl, combine the remaining 1/4 cup milk and the cornstarch, stirring to dissolve the cornstarch. Set aside.
  3. In a medium mixing bowl, whisk together the yolks and the sugar. When the milk mixture has come to a boil, pour it through a strainer onto the beaten yolks-sugar mixture, whisking constantly. Return this mixture to the saucepan and whisk in the milk-cornstarch mixture. Over medium heat, bring to a boil again, whisking all the while, and continue to whisk until the mixture thickens. Add the vanilla, remove from the heat, and scrape into a bowl.
  4. Cover the surface of the cream with plastic wrap to prevent it from forming a skin.
  5. (The cream keeps for up to 3 days, tightly and refrigerated.) Chill before serving.

How to Assemble the Sponge Cake with Pastry Cream and Berries Cake:

  1. Whip the 35% with whipping attachment of electric mixture until soft peaks form.
  2. Place one third of the jelly roll cake on plate..
  3. Spread with pastry cream.
  4. Top with berries.
  5. Place the second layer of jelly roll cake on top.
  6. Spread with pastry cream.
  7. Top with berries.
  8. Place third layer of jelly roll on top of berries.
  9. Spread whipping cream on top layer.
  10. Add sliced berries and sprinkle with toasted almonds.
  11. Refrigerate until ready to serve.
http://liliana-tommasini.suite101.com/berry-sponge-cake-with-pastry-cream-recipe-a66453


Sunday, February 19, 2012

Salted Caramel Brownies

Fudge Brownies with Salted Caramel topping
yield: 24 brownies


1 cup (2 sticks) Butter
2 cups Sugar
1/4 cup Brown Sugar
4 Eggs
1 1/4 cup Cocoa Powder
1 tsp Salt
1 tsp Baking Powder
1 1/2 cups AP Flour
2 cups Dark Chocolate Chips (I used Hersheys Special Dark)

preheat oven to 350 degrees, prepare 9×13 pan

1. Melt butter in a sauce pot. Add sugar and stir over medium heat for 3-5 minutes, until sugar has melted slightly and liquid is silky.
2. Remove from heat and pour into a large bowl. Use a spatula to scrape all butter into bowl.
3. Add eggs one at a time, stirring between each one. Add cocoa powder and stir until fully combined.
4. Add baking powder, salt and flour. Stir until just combined, though make sure there are no lumps or ‘pockets’ full of flour in the batter. Add the chocolate chips.
5. Pour into a prepared 9×13 pan and use the back of a spoon to spread out evenly. Bake for 40 minutes until a toothpick comes out clean. Let cool at least one hour before cutting.

Salted Caramel Topping
yield: 1 cup topping

1/2 cup (1 stick) Butter
1 cup Dark Brown Sugar
1/4 cup Whole Milk
2 cups Powdered Sugar, sifted
Salt, for topping


Friday, September 23, 2011

Salted Caramel Brownies


Fudge Brownies with Salted Caramel topping
yield: 24 brownies
http://www.natalieskillercuisine.com/2010/08/fudge-brownies-with-salted-caramel-topping.html

1 cup (2 sticks) Butter
2 cups Sugar
1/4 cup Brown Sugar
4 Eggs
1 1/4 cup Cocoa Powder
1 tsp Salt
1 tsp Baking Powder
1 1/2 cups AP Flour
2 cups Dark Chocolate Chips (I used Hersheys Special Dark)

preheat oven to 350 degrees, prepare 9×13 pan

1. Melt butter in a sauce pot. Add sugar and stir over medium heat for 3-5 minutes, until sugar has melted slightly and liquid is silky.
2. Remove from heat and pour into a large bowl. Use a spatula to scrape all butter into bowl.
3. Add eggs one at a time, stirring between each one. Add cocoa powder and stir until fully combined.
4. Add baking powder, salt and flour. Stir until just combined, though make sure there are no lumps or ‘pockets’ full of flour in the batter. Add the chocolate chips.
5. Pour into a prepared 9×13 pan and use the back of a spoon to spread out evenly. Bake for 40 minutes until a toothpick comes out clean. Let cool at least one hour before cutting.

Salted Caramel Topping
yield: 1 cup topping

1/2 cup (1 stick) Butter
1 cup Dark Brown Sugar
1/4 cup Whole Milk
2 cups Powdered Sugar, sifted
Salt, for topping
From Cooking Light (also Light and Local)

Salted Caramel Brownies
Source: Cooking Light
Yield: 16 small brownies, 12 larger ones (CL says the yield is 20, but frankly, that's too small of a brownie for me.)

I actually doubled this recipe for a 9x13 baking pan and it worked out perfectly. They were a little thicker, but honestly, I like it better that way. Be careful, these things are addicting.

Ingredients:

Brownies:

3.38 ounces all-purpose flour (about 3/4 cup)
1 cup sugar
3/4 cup unsweetened cocoa
1/2 cup packed brown sugar
1/2 teaspoon backing powder
6 tablespoons butter, melted
2 large eggs
1 teaspoon vanilla extract
cooking spray
Topping:

1/4 cup butter
1/4 cup packed brown sugar
3 1/2 tablespoons evaporated fat-free milk, divided
1/4 teaspoon vanilla extract
1/2 cup powdered sugar
1 ounce bittersweet chocolate, coarsely chopped
1/8 teaspoon coarse sea salt
Instructions:

Preheat oven to 350 degrees
Start preparing your brownies. Combine flour, sugar, cocoa, brown sugar, and baking powder in a large bowl, stirring with a whisk until well mixed.
Combine your 6 tablespoons of melted butter, eggs, and the vanilla extract.
Add the butter mixture to the flour mixture and stir until well combined.
Pour batter into a 9x9 square metal baking pan lightly coated in cooking spray.
Bake brownies for 19 minutes or until a toothpick comes out from the center cleanly.
Cool in the pan on a wire rack.
Once brownies are cooled, begin making your topping. Melt 1/4 cup butter in a saucepan over medium heat. Add 1/4 cup brown sugar, and 1 1/2 tablespoons of the evaporated milk. Cook the mixture for at least two minutes.
Take the mixture off the heat, add you vanilla, powdered sugar, and stir with a whisk until everything comes together and becomes smooth.
You're now going to pour the mixture over the brownies, and then use an offset spatula or just a regular one to make sure the brownies are well covered.
Allow to set for 20 minutes to set. (I found putting it in the fridge really helped with this step.
Finally, take a microwave-safe bowl, combine your chocolate and 2 tablespoons of the evaporated milk. Microwave for 45 seconds or until melted... make sure you stir it halfway through the cooking time.
Drizzle over the caramel topping on the brownies, sprinkle with your 1/8th of a teaspoon of sea salt.
Allow the chocolate to set, then cut into squares.

Thursday, August 25, 2011

Chocolate Cake Comparison

Sandy's Chocolate Cake
http://allrecipes.com/Recipe/Sandys-Chocolate-Cake/Detail.aspx

Ingredients
3 cups packed brown sugar
1 cup butter or margarine, softened
4 eggs
2 teaspoons vanilla extract
2 2/3 cups all-purpose flour
3/4 cup baking cocoa
1 tablespoon baking soda
1/2 teaspoon salt
1 1/3 cups sour cream
1 1/3 cups boiling water
FROSTING:
1/2 cup butter or margarine
3 (1 ounce) squares unsweetened chocolate
3 (1 ounce) squares semisweet chocolate
5 cups confectioners' sugar
1 cup sour cream
2 teaspoons vanilla extract

Directions
In a mixing bowl, cream brown sugar and butter. Add eggs, one at a time, beating well after each addition. Beat on high speed until light and fluffy. Blend in vanilla. Combine flour, cocoa, baking soda and salt; add alternately with sour cream to creamed mixture. Mix on low just until combined. Stir in water until blended. Pour into three greased and floured 9-in. round baking pans. Bake at 350 degrees F for 35 minutes. Cool in pans 10 minutes; remove to wire racks to cool completely. For frosting, in a medium saucepan, melt butter and chocolate over low heat. Cool several minutes. In a mixing bowl, combine sugar, sour cream and vanilla. Add chocolate mixture and beat until smooth. Frost cooled cake.

Canadian Living


Ingredients
1/2 cup butter , softened
3/4 cup granulated sugar
2 eggs
1 tsp vanilla (5 mL)
1-1/4 cups sifted cake and pastry flour
1/4 cup cocoa powder (50 mL)
1 tsp baking powder
1/4 tsp baking soda
1/4 tsp salt
2/3 cup buttermilk (150 mL)

Chocolate Mousse:
1 pkg (7 g) gelatin
2/3 cup milk (150 mL) milk
4 egg yolks
1/4 cup granulated sugar(50 mL)
1 Pinch salt
(113 g) bittersweet chocolate, melted
2 oz milk chocolate , melted
2 tbsp dark rum , (optional)
1 tsp vanilla (5 mL)
2 cups whipping cream (500 mL)
Chocolate Ganache:
6 oz bittersweet chocolate , chopped 6 6oz (170 g)
2/3 cup whipping cream (150 mL)

Preparation:
Grease 9-inch (2.5 L) springform pan; line bottom with parchment or waxed paper. Set aside.

In large bowl, beat butter with sugar until fluffy; beat in eggs, 1 at a time. Beat in vanilla. In separate bowl, sift together flour, cocoa, baking powder, baking soda and salt. Stir into butter mixture alternately with buttermilk, making 3 additions of dry ingredients and 2 of buttermilk. Scrape into prepared pan; smooth top.

Bake in centre of 350°F (180°C) oven until cake tester comes out clean, 30 minutes. Let cool on rack for 20 minutes. Remove side of pan; let cool. (Make-ahead: Cover and set aside for up to 24 hours.)

Chocolate Mousse: Meanwhile, in small bowl, sprinkle gelatin over 2 tbsp (25 mL) water; set aside. In small saucepan, heat milk over medium-high heat just until tiny bubbles form around edge. In heatproof bowl, whisk together egg yolks, sugar and salt ; slowly whisk in milk. Place bowl over saucepan of simmering water; cook, stirring, until custard is 160°F (70°C) and thick enough to coat back of spoon, about 8 minutes. Remove from heat.

Stir in gelatin mixture until melted. Whisk in bittersweet and milk chocolates, rum (if using) and vanilla. Refrigerate, stirring twice, until cold and mixture can mound on spoon, about 15 minutes.

In separate bowl, whip cream; whisk one-quarter into chocolate mixture. Fold in remaining cream.

Line side of 10-inch (3 L) springform pan with parchment paper to extend 1 inch (2.5 cm) above rim. Cut cake horizontally in half. Place 1 layer in prepared pan. Pour in half of the mousse, letting mousse extend over side of cake. Top with remaining layer. Pour in remaining mousse to cover top and side of cake; smooth top. Refrigerate until set, 2 hours.

Chocolate Ganache: Place chocolate in bowl. In small saucepan, bring cream to boil; pour over chocolate and whisk until smooth. Let cool for 30 minutes. Pour over mousse; smooth with palette knife. Refrigerate until set, about 1 hour. (Make-ahead: Cover and refrigerate for up to 24 hours.)

Jane's Sweets
Chocolate Mousse CakeChocolate Mousse Cake
Source:

Because the fluffy mousse needs to chill for about four hours before it can be used, feel free to prepare it first, before you bake the cake.

To make the cake:

Preheat the oven to 350 degrees. Grease three 9" round cake pans. Line the bottom of each pan with parchment cut to fit. Grease the parchment, then flour the bottom and sides of each pan, tapping out the excess flour.

2 cups All-Purpose flour (I used unbleached)
2 cups granulated sugar
3/4 cup cocoa powder (I used natural cocoa)
1 and 1/2 tsp. baking powder
1 and 1/2 tsp. baking soda
3/4 tsp. salt
1 cup milk (I used 2 percent)
1 cup strong brewed coffee
3/4 cup vegetable oil (I used canola)
2 eggs, large

In the large bowl of your mixer, combine the flour, sugar, cocoa, baking powder, baking soda, and salt. All at once, add in the milk, coffee, oil, and eggs. Beat this mixture at medium speed just until smooth. The batter will be very thin. Pour it evenly into the three prepared pans. Bake the cakes for about 20 to 25 minutes, until a toothpick inserted in the center comes out clean and the cake springs back when very lightly touched. Cool the cakes in their pans, on racks, for 10 to 15 minutes. Carefully invert the cakes to remove them from their pans, then invert them again so they can finish cooling on racks right side up.

To make the mousse:

Makes approximately 4 and 1/2 cups (which is a lot--you'll have some leftover!)

1 envelope unflavored gelatin
3 Tbsp. cold water
1/4 cup boiling water
1 cup granulated sugar
1/2 cup unsweetened cocoa powder (use natural, or Dutch process, or a combo; I did the latter)
3 cups heavy cream

In a little bowl, soften the gelatin in the cold water, letting it stand undisturbed for two minutes. Add in the boiling water, and stir it slowly until the gelatin completely dissolves and no lumps are apparent. Set this aside.

In another small bowl, combine the sugar and the cocoa well, with a fork or whisk.
In a medium size mixer bowl, on medium speed, beat the heavy cream until it's quite foamy. Into this, gradually pour the sugar mixture and beat until it holds stiff peaks.

Then, stir in the dissolved gelatin by hand, folding it in evenly (if you don't distribute the gelatin evenly through careful stirring and folding, the mousse will be thicker and firmer in some spots, and too soft in others). Cover the bowl with plastic wrap and chill it in the fridge for at least four hours.

To make the chocolate icing:

Makes approximately 3 cups (I had about 1/2 a cup of this leftover)

1 cup granulated sugar
1 cup heavy cream
5 (1 oz. each) squares unsweetened chocolate
1/2 cup and 2 Tbsp. unsalted butter (doesn't have to be softened)
1 cup confectioner's sugar

Combine the granulated sugar and the cream in a medium size heavy-bottomed saucepan. Carefully bring it to a boil over medium-high heat, then keep it on a low simmer for 6 minutes. Stir it often and watch it closely so it doesn't come to a full boil again. Taking the pan off the heat, add in the butter and chocolate, stirring until it's all completely melted and the mixture is perfectly smooth; let it cool in the pan for 10 minutes. Using a whisk, incorporate all of the confectioner's sugar. Let the icing cool until it reaches a spreadable consistency.

To prepare the grated chocolate, and chocolate curls, for the outside of the cake:

You'll want to have at least 3/4 of a cup of grated chocolate available to cover the cake. If you can find chocolate that comes in big chunks, that is the easiest form in which to hold it for grating. I use Callebaut, a very good brand, which can be purchased in pieces by the pound. I use a combo of dark bittersweet chocolate and milk chocolate, which works well because the milk chocolate is softer and sweeter, while the dark chocolate is a bit drier and moderates the sweetness. Have the grated chocolate in a bowl close at hand before you are ready to coat the sides of the cake. Place a baking sheet with shallow sides on your work surface right near the bowl.

Using a vegetable peeler, peel some larger curls from the chocolate chunks and set them aside on a plate (or put them in the fridge if they're quite soft; they're always extremely fragile and often break when touched). It seems easier to make nice curls from milk chocolate since it tends to be softer and more flexible.

To assemble the cake:

Using a cardboard cake-round (if at all possible, or something that can function in the same capacity), place the first cake layer on it. Using an offset spatula, ice the top of the layer thickly with the chilled mouse. Place the second layer atop this, and cover it as well with a thick layer of the mousse. Place the third and final cake layer on top. If at this point the mousse seems very soft, put the whole cake into the fridge for about half an hour, or into the freezer for 15 minutes.

Using an offset spatula, spread the chocolate icing on the top and sides of the cake. It should be spread on fairly evenly, but it's not critical that you try to make it incredibly smooth, since it will be covered with grated chocolate, and you can gently pat down any uneven areas. While the icing is still quite soft, pick up the iced cake from beneath the cake-board (slide a thin metal spatula beneath it to help you lift it onto your hand). Holding the cake carefully on your non-dominant hand, sprinkle the sides of the cake with the grated chocolate, patting it on gently. Do this while holding the cake above the baking sheet so it can catch the falling chocolate crumbs and you can scoop them up again. Turn the cake as needed until the whole thing is completely covered. Carefully slide/sprinkle the chocolate curls onto the top of the cake. Place your cake on its serving dish. Keep the cake in the refrigerator until shortly before you'll cut it. Because the filling and the icing are rich with dairy products, you should store any leftover cake in the fridge as well.


Wednesday, August 24, 2011

Chocolate Chip Cookies (Thick and Chewy)

Thick and Chewy Chocolate Chip Cookies

Tips from Browneyedbaker

http://www.browneyedbaker.com/2008/06/21/thick-and-chewy-chocolate-chip-cookies/

The secret to the thick and chewy cookies is the combination of using melted butter, an extra egg yolk, and a higher ratio of brown sugar to white sugar. Also, definitely follow the instructions for making jagged edges on the top of the cookie – this gives them the crinkled and craggly bakery cookie look. In order to ensure mine were all about the same size.

Also heed the instructions to remove the cookies from the oven as soon as the outsides are set but the centers are still puffy and soft. Doing so plays a large part in the resulting texture. Cooling the cookies on the baking sheets means they will continue to bake after being taken out of the oven, but without the circulating air of a cooling rack, they will retain their soft texture. I know for me it is often hard to take cookies out of the oven unless they look completely done, but have faith! You don’t want to overbake these in the oven!

Why should you weigh your ingredients? Since I began baking bread more often I started reading about how important it is to weigh the ingredients, as there is quite a delicate balance between the flour, yeast, and liquid used in most bread recipes. I haven’t really encountered weight measurement outside of breads, but this cookie recipe in Baking Illustrated provided weight measurements for the dry ingredients. To see how close I was I did a regular measurement and then weighed it. In all of the cases, my measurements came out 1-2 ounces more than the weight measurement provided in the recipe. It becomes easy to see how a heavy-handed scoop could turn thick and chewy cookies into dry and dense cookies! So, I would encourage all of you to invest in a kitchen scale and use it, use it, use it!!

http://www.browneyedbaker.com/2008/06/21/thick-and-chewy-chocolate-chip-cookies/

Thick and Chewy Chocolate Chip Cookies
(Source: Baking Illustrated, page 434)

Makes about 18 large cookies.

These oversized cookies are chewy and thick, like many of the chocolate chip cookies sold in gourmet shops and cookie stores. They rely on melted butter and an extra egg yolk to keep their texture soft. These cookies are best served warm from the oven but will retain their texture even when cooled. To ensure the proper texture, cool the cookies on the baking sheet. Oversized baking sheets allow you to get all the dough into the oven at one time. If you’re using smaller baking sheets, put fewer cookies on each sheet and bake them in batches.

2 cups plus 2 tablespoons (10 5/8 ounces) unbleached all-purpose flour
1/2 teaspoon baking soda
1/2 teaspoon salt
12 tablespoons (1 1/2 sticks) unsalted butter, melted and cooled until warm
1 cup packed (7 ounces) light or dark brown sugar
1/2 cup (3 1/2 ounces) granulated sugar
1 large egg plus 1 egg yolk
2 teaspoons vanilla extract
1-1 1/2 cups semisweet chocolate chips

1. Adjust the oven racks to the upper- and lower-middle positions and heat the oven to 325 degrees. Line 2 large baking sheets with parchment paper or spray them with nonstick cooking spray.

2. Whisk the flour, baking soda, and salt together in a medium bowl; set aside.

3. Either by hand or with an electric mixer, mix the butter and sugars until thoroughly blended. Beat in the egg, yolk, and vanilla until combined. Add the dry ingredients and beat at low speed just until combined. Stir in the chips to taste.

4. Roll a scant 1/4 cup of the dough into a ball. Hold the dough ball with the fingertips of both hands and pull into 2 equal halves. Rotate the halves 90 degrees and, with jagged surfaces facing up, join the halves together at their base, again forming a single ball, being careful not to smooth the dough’s uneven surface. Place the formed dough balls on the prepared baking sheets, jagged surface up, spacing them 2 1/2 inches apart.

5. Bake until the cookies are light golden grown and the outer edges start to harden yet the centers are still soft and puffy, 15 to 18 minutes, rotating the baking sheets front to back and top to bottom halfway through the baking time. Cool the cookies on the sheets. Remove the cooled cookies from the baking sheets with a side metal spatula.

Thursday, July 14, 2011

Galaktoboureko-greek pie-semolina


http://www.kalofagas.ca/2008/04/29/galaktoboureko-%CE%B3%CE%B1%CE%BB%CE%B1%CE%BA%CF%84%CE%BF%CE%BC%CF%80%CE%BF%CF%8D%CF%81%CE%B5%CE%BA%CE%B

My dear freind Penny forwarded me a recipe for Portokalopita and we decided to google and look at other versions..comparing, trying to choose the best..basically we could envision with our minds what it would taste and look like..so went clicking from one website to another, until we reached this..and I decided I HAD to try this one....i'm posting the recipe.

Galaktoboureko is as popular (if not more) than a Greek baklava. Essentially, it’s a dessert of custard made from semolina flour and a crispy phyllo shell and soaked in a lemon syrup.
As long as you allow the phyllo to defrost properly in the fridge overnight, ensure it’s bought from a store that sells fresh phyllo (high turn over) and you’ve ensured the phyllo stays moist and you’ve brushed melted butter on each sheet…you’ll do just fine!
Galaktoboureko (γαλακτομπούρεκο)


7 eggs, room temp.
10 cups of whole milk (room temp.)
2 cups of sugar
1 cup of fine semolina flour
1 heaping Tbsp. of butter
zest of 1 lemon
1 package of commercial phyllo
2 sticks of melted butter (for brushing)
14″ X 11″ Corningware baking dish

Syrup
2 cups of sugar
1 cup of water
juice & zest of 1/2 lemon

Place a large pot over medium-high heat and add your eggs, sugar and semolina and mix constantly over medium heat until incorporated.
Add the milk, zest and butter and now continue to mix using a potato masher until your custard is slightly thick, yet not runny. Place a tea towel between the pot of custard and the pot’s lid, cover and reserve (off the heat).
Pre-heat your oven to 350F. Butter the baking dish. Count how many sheets you have in your package of phyllo and divide in half. One half will go on the bottom, the second half will go on top.

In the bottom of the pan, layer your one half of phyllo, leaving the edges hanging over the sides of the pan. Brush each sheet generously with the melted butter. Pour the custard mixture over the bottom phyllo layers.

Fold the excess phyllo over and into the pan and evenly distribute the remaining sheets of phyllo to entirely cover the custard. Again, ensure that each sheet is brushed generously with butter.
With a very sharp knife, score the phyllo (just penetrating) to make your desired size and shapes of your Galaktoboureko pieces (this makes it easier to cut later and this will also allow the syrup to penetrate the pie better.
Bake in the middle rack for 35-40 minutes or until the top is nice and golden-brown. Allow the Galaktoboureko to cool to room temperature.
To make your syrup, add the sugar, water, juice and zest and bring to a boil and count 10 minutes for your syrup to develop.
Using a ladle, pour your syrup over the Galaktoboureko (1 ladle at a time) until your syrup has been absorbed.
Carefully complete the slicing of your pieces (tracing your initial cuts), allow to cool for approx. 1 hour and refrigerate uncovered over night to set. Serve cold or room temperaturengwithmarialoi.com/recipe/recipeview/galaktoboureko-sweet-milk-pie

Thursday, June 23, 2011

Strawberry shortcake Whipped Cream Cheese Frosting


I am planning on making a strawberry shortcake, what nicer way to enjoy strawberries? and it has all our favourites: whipped cream, strawberries, cake..yum yum..my kids are gonna luv me forever..I fell in love with the recipe from 'The Way the Cookie Crumbles" adapted from the Cooks Illustrated recipe
http://www.crumblycookie.net/2011/05/22/strawberry-cream-cake/

Strawberry Cream Cake (from Cook’s Illustrated)
12 servings
Cake:
1¼ cups (5 ounces) cake flour
1½ teaspoons baking powder
¼ teaspoon table salt
1 cup (7 ounces) sugar
5 large eggs (2 whole and 3 separated), room temperature
6 tablespoons unsalted butter, melted and cooled slightly
2 tablespoons water
2 teaspoons vanilla extract

Strawberry Filling:
2 pounds fresh strawberries (medium or large, about 2 quarts), washed, dried, and stemmed
4–6 tablespoons sugar
2 tablespoons Kirsch
Pinch table salt

Whipped Cream:
8 ounces cream cheese, room temperature
½ cup (3½ ounces) sugar
1 teaspoon vanilla extract
⅛ teaspoon table salt
2 cups heavy cream

1. FOR THE CAKE: Adjust an oven rack to the lower-middle position and heat the oven to 325 degrees. Grease and flour a round 9 by 2-inch cake pan or 9-inch springform pan and line with parchment paper. Whisk flour, baking powder, salt, and all but 3 tablespoons sugar in a mixing bowl. Whisk in 2 whole eggs and 3 yolks (reserving whites), butter, water, and vanilla; whisk until smooth.

2. In a clean bowl of a standing mixer fitted with the whisk attachment, beat the remaining 3 egg whites at medium-low speed until frothy, 1 to 2 minutes. With the machine running, gradually add the remaining 3 tablespoons sugar, increase the speed to medium-high, and beat until soft peaks form, 60 to 90 seconds. Stir one-third of the whites into the batter to lighten; add the remaining whites and gently fold into the batter until no white streaks remain. Pour the batter into a prepared pan and bake until a toothpick or wooden skewer inserted into the center of the cake comes out clean, 30 to 40 minutes. Cool in the pan 10 minutes, then invert the cake onto a greased wire rack; peel off and discard the parchment. Invert the cake again; cool completely, about 2 hours.

3. FOR THE STRAWBERRY FILLING: Halve 24 of the best-looking berries and reserve. Quarter the remaining berries; toss with 4 to 6 tablespoons sugar (depending on the sweetness of the berries) in a medium bowl and let sit 1 hour, stirring occasionally. Strain the juices from the berries and reserve (you should have about ½ cup). In the workbowl of a food processor fitted with the metal blade, give the macerated berries five 1-second pulses (you should have about 1½ cups). In a small saucepan over medium-high heat, simmer the reserved juices and Kirsch until the mixture is syrupy and reduced to about 3 tablespoons, 3 to 5 minutes. Pour the reduced syrup over the macerated berries, add a pinch of salt, and toss to combine. Set aside until the cake is cooled.

4. FOR THE WHIPPED CREAM: When the cake has cooled, place the cream cheese, sugar, vanilla, and salt in the bowl of a standing mixer fitted with the whisk attachment. Whisk at medium-high speed until light and fluffy, 1 to 2 minutes, scraping down the bowl with a rubber spatula as needed. Reduce the speed to low and add heavy cream in a slow, steady stream; when it’s almost fully combined, increase the speed to medium-high and beat until the mixture holds stiff peaks, 2 to 2½ minutes more, scraping the bowl as needed (you should have about 4½ cups).


Another way to do the Whipped Cream (from All Recipes http://allrecipes.com/Recipe/whipped-cream-cream-cheese-frosting/Detail.aspx)
Ingredients
1 (8 ounce) package cream cheese
1 cup white sugar
1/8 teaspoon salt
1 teaspoon vanilla extract
1 1/2 cups heavy whipping cream

Directions
In a small bowl beat whipping cream until stiff peaks form; set aside.
In a large bowl combine cream cheese, sugar, salt and vanilla. Beat until smooth, then fold in whipped cream.

5. TO ASSEMBLE THE CAKE: Using a large serrated knife, slice the cake into three even layers. Place the bottom layer on a cardboard round or cake plate and arrange a ring of 20 strawberry halves, cut sides down and stem ends facing out, around the perimeter of the cake layer. Pour one half of the pureed berry mixture (about ¾ cup) in the center, then spread to cover any exposed cake. Gently spread about one-third of the whipped cream (about 1½ cups) over the berry layer, leaving a ½-inch border from the edge. Place the middle cake layer on top and press down gently (the whipped cream layer should become flush with cake edge). Repeat with 20 additional strawberry halves, the remaining berry mixture, and half of the remaining whipped cream; gently press the last cake layer on top. Spread the remaining whipped cream over the top; decorate with the remaining cut strawberries. Serve, or chill for up to 4 hours.

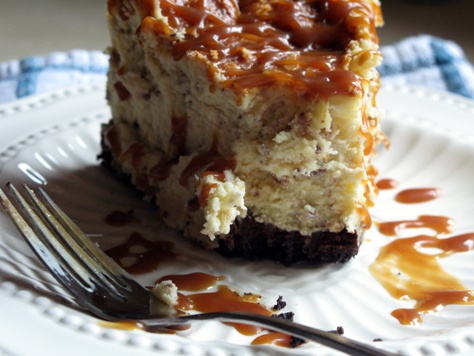
Chocolate Caramel Cheesecake


By Julie Albert & Lisa Gnat (author: Bite me):Serves 12

Gonna make this for Keith's bday..He said he wasn't a big fan of cheesecake but then he's only had the store bought ones..this one aims to change his mind..
Ingredients for Crust

1½ cups Oreo baking crumbs
½ cup melted butter
¼ cup whipping cream
1 cup semi-sweet chocolate

Filling
4 (8oz/250g) packages cream cheese, softened
1 cup sugar
4 large eggs
1½ tsp vanilla extract
2 cups chopped toffee bits (Heath or Skor bar)
¼ cup purchased caramel sauce
Directions
1) Preheat oven to 350°F. Wrap the outside of a 9-inch springform pan with aluminum foil.

2) For the crust, in a medium bowl, combine Oreo baking crumbs and melted butter. Press the mixture evenly and firmly over the bottom and halfway up the sides of the springform pan. In a small saucepan, bring the whipping cream to a simmer over low heat. Add semi-sweet chocolate and stir until melted. Remove from heat and pour evenly over the crust.

3) Chill crust in refrigerator to firm slightly while preparing the filling.

4) For the filling, using an electric mixer, beat the cream cheese on medium speed until smooth, scraping the bowl several times. Gradually add the sugar and continue to beat the mixture. One at a time, beat in the eggs, scraping the bowl as needed. Using a spatula fold in vanilla extract and toffee bits. Pour mixture into prepared crust. Finish by spooning caramel sauce over the top. Place pan on a baking sheet and bake 65-70 minutes. Remove from oven and let cool to room temperature. Cover with plastic wrap and refrigerate at least 6 hours before serving.

Tuesday, June 21, 2011

CREAM PUFFS


from Canadian Living Cooks Step by Step

Pastry Cream

3 cups (750 ml) milk
3 eggs
3/4 cup (175 ml) granulated sugar
1/4 cup (50 ml) all-purpose flour
1 tbsp. (15 ml) cornstarch
2 tbsp. butter (25 ml)
1 1/2 tsp. vanilla (7 ml)
2 cups (500 ml) whipping cream
In heavy saucepan, heat milk until steaming. Meanwhile, in bowl, whisk together eggs, sugar, flour and cornstarch; gradually pour in milk in thin stream, whisking constantly. Return to clean pan. Cook over medium heat, whisking, for 5 minutes or just until boiling; cook, whisking, for 2 minutes longer or until thickened. Remove from heat; stir in butter and vanilla.
Pour into bowl; place waxed paper directly on surface to prevent skin from forming. Refrigerate until cool, at least 4 hours. Whip cream, gently fold into pastry cream with spatula just until combined.
Note: Pastry cream can be refrigerated for up to 3 days.

Choux Pastry

2 cups (500 ml) water
1 cup (250 ml) butter, cubed
1/4 tsp. (1 ml) salt
2 1/2 cups (625 ml) all-purpose flour
8 eggs
Glaze

1 egg
Line two 17- x 11-inch (45 x 29 cm) baking sheets with parchment paper, or grease and dust with flour. In heavy saucepan, bring half of each of the water, butter and salt to boil over high heat; immediately remove from heat. Add half of the flour all at once; stir vigorously with wooden spoon until mixture comes away from side of pan in smooth ball. Cook over medium heat, stirring constantly, for 4 minutes or until film forms on bottom of pan. Transfer to bowl; stir for 30 seconds to cool slightly. Make well in centre.
Using electric mixer, beat in 4 of the eggs, 1 at a time, beating well after each addition. Beat until shiny and pastry holds its shape when lifted. Using pastry bag fitted with 1/4-inch (5 mm) plain tip or with spoon, pipe pastry into 1 1/4-inch (3 cm) round by 3/4-inch (2 cm) high mounds on pans. Glaze: Beat egg with 1 tbsp (15 ml) water; brush half over pastry, flattening tips and making sure glaze doesn’t drip onto pan.
Bake in 425 degree F (220 degree C) oven for 20 minutes; rotate trays. Reduce heat to 375 degrees F (190 degrees C); bake for 10 minutes or until golden. With knife, make small hole in bottom of each; bake for 5 minutes. Turn off oven; let stand in oven for 10 minutes to dry. Transfer to rack; let cool. With wooden spoon handle, enlarge hole in each puff. Repeat with remaining choux pastry ingredients and glaze to make 85 puffs in total.
Spoon pastry cream into pastry bag fitted with 1/4-inch (5 mm) plain tip. Pipe into hole in each puff, squeezing bag gently until puff is filled with cream. Place on waxed paper-lined baking sheet. (Puffs can be lightly covered with plastic wrap and refrigerated for up to 1 hour.)
I always like to dust them with icing sugar and pile them high on a lovely serving dish. Warning: they go very quickly!